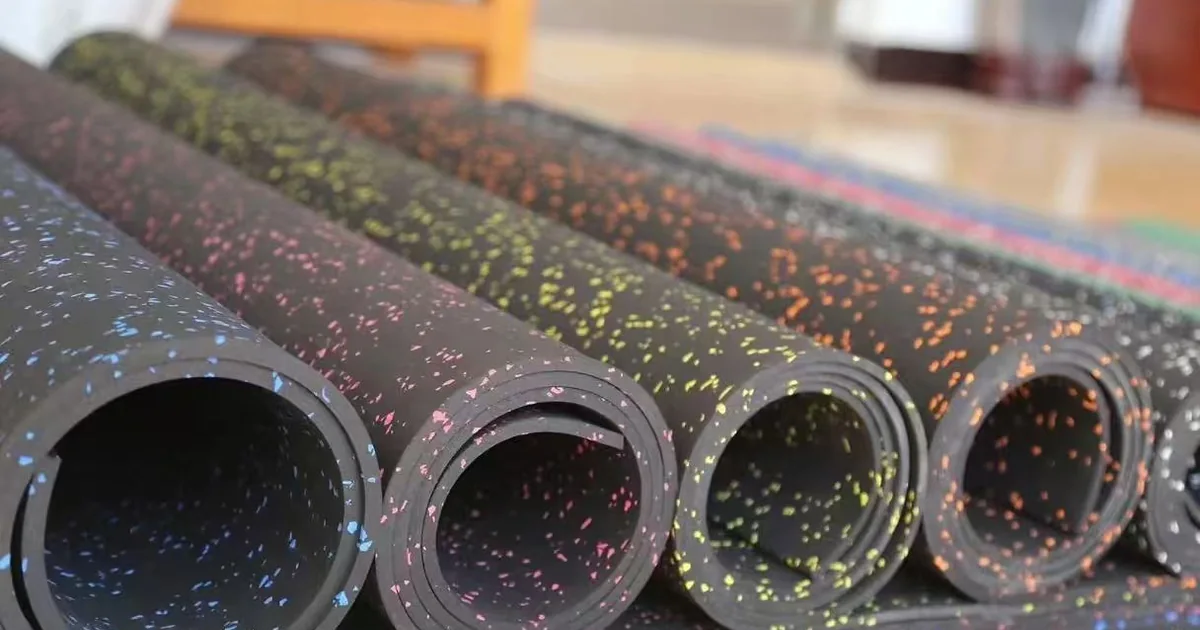
Start with the site, not the adhesive. Confirm the room dimensions, substrate, moisture and crack condition, transitions, columns, drains and finished-floor height. Rubber rolls are normally bonded with compatible two-component polyurethane adhesive; UMAX composite tiles use required lock connectors, with adhesive decided separately for the project. The local installer and product-specific technical data control the final method.
A good rubber gym flooring installation begins before the pallets arrive. Product format, floor condition, room geometry and the installer’s method must be planned together. A flat rectangular room with a prepared concrete base is different from a renovation with columns, curved boundaries, door thresholds and several surface types.
This guide translates UMAX product specifications and general installation instructions into a buyer-facing checklist. It helps gym owners, contractors and distributors prepare a reliable quotation and installation brief. It is not a substitute for site inspection, the selected adhesive technical data or local building requirements.
1. Choose the format before planning installation
| Planning point | Rubber flooring rolls | Composite rubber gym tiles |
|---|---|---|
| UMAX format | 1 m × 10 m | 500 × 500 mm or 1000 × 1000 mm |
| Available thickness | 3-12 mm | 15-50 mm |
| Primary positioning | Reference lines and bonded sheets | Modular grid with required lock connectors |
| Adhesive direction | Normally required | Project-dependent; locks still required |
| Seam pattern | Fewer, longer seams | Regular modular joints |
| Handling | Plan roll access, movement and alignment | Move and position individual units |
| Local replacement | Repair or replace a sheet section | Replace a local tile when the layout allows |
If the format is still open, compare the full rubber flooring rolls vs tiles buyer guide. Thickness alone should not decide the system; include training use, expected loads, subfloor, handling, joints and maintenance.
Send the floor plan before selecting the system
Include dimensions, training zones, subfloor, columns, thresholds, preferred color and destination. UMAX can compare roll, tile and mixed-format directions before quotation.
Plan My Flooring2. Record the jobsite conditions
Measure the clear room length and width, then mark every fixed object that interrupts the floor. Include columns, wall returns, equipment anchors, floor drains, access panels, ramps, door swings and transitions to other finishes. Photographs should show both the whole room and close details.
Subfloor information to collect
- Existing substrate type, such as concrete, tile or another stable base.
- Visible cracks, hollow areas, loose material, oil, grease or adhesive residue.
- Flatness concerns, low spots and abrupt height changes.
- Moisture concerns and the test method required by the local installer.
- Expansion or movement joints that must remain functional.
- Finished-floor height limits at doors, ramps and adjoining surfaces.
- Site temperature and the product and adhesive storage conditions.
The base must be clean, flat, dry, sound and free from cracks or hollow spots before flooring work proceeds. Defects should be repaired with a method compatible with the substrate and the final flooring system.

3. Build a layout and quantity plan
Draw the flooring direction before installation. For rolls, show the orientation of each 1 m-wide strip and where long seams will fall. For tiles, establish a grid that avoids narrow perimeter cuts and records the connector direction. Keep visually important seams away from irregular edges where practical.
Add a cutting and fitting allowance based on the real room shape. A simple rectangle and a room with many columns do not need the same allowance. The quotation should distinguish ordered material from net measured floor area rather than hiding the difference.
Dry-fit complex boundaries
Rubber rolls and tiles can be site-cut around walls, columns and selected curved or irregular boundaries. For complex areas, create a template, transfer the shape to the flooring and dry-fit the piece before final bonding or connector installation. Cut progressively; an oversized piece can be trimmed again, while an undersized cut may need replacement.
An installation-progress photo may show tools, offcuts, cables or incomplete edges. Label it Installation in progress and use it to document the fitting method, not as evidence of final handover quality.
4. Prepare and clean the subfloor
- Remove movable equipment and protect fixed items.
- Sweep, vacuum or mop away dust and loose debris.
- Remove oil, grease and incompatible surface contamination.
- Repair cracks, hollow areas and unstable sections before proceeding.
- Confirm that the repaired floor is flat, dry and sound.
- Recheck door clearances and transition heights after repairs.
Do not use adhesive to compensate for an unsuitable base. Thick or uneven adhesive application can create inconsistent support and does not replace proper substrate repair.
5. Install rubber flooring rolls
UMAX installation instructions specify a waterproof, curing-type two-component polyurethane adhesive for rubber sheets. The two components must be mixed according to the adhesive manufacturer’s ratio and working-time instructions. Brand-specific guidance takes priority over a general article.

Roll installation sequence
- Set reference lines. Mark the planned strip direction and verify the first sheet position.
- Mix only workable adhesive. Follow the stated mixing ratio, working time and safety instructions.
- Spread a uniform coat. Use the specified notched trowel and avoid puddles or uncovered gaps.
- Observe open time. Follow the adhesive supplier’s instruction for the correct laying condition.
- Position the sheet. Unroll and align it to the reference line without dragging contamination into the bond.
- Press progressively. Work from one end and expel trapped air with a suitable hand or heavy roller.
- Close the seams. Press adjoining edges with a seam roller so the joint is flush and secure.
- Roll the completed area again. Confirm full contact and remove remaining bubbles before handover.
Remove adhesive residue promptly using the method recommended by the adhesive supplier. Avoid walking on newly placed sections until they have been fully rolled, and protect the work during curing. Final traffic timing must follow the selected adhesive data.
6. Install composite rubber gym tiles
UMAX composite tiles use a 1 mm EPDM surface over a thicker rubber base. The system is supplied with lock connectors, which are required to position adjoining tiles. Adhesive is a separate project decision and may be used according to the substrate, perimeter, traffic, room geometry and installer assessment.

Tile installation sequence
- Mark a square reference grid and verify the starting corner.
- Dry-lay several tiles to confirm the joint pattern and perimeter cuts.
- Place the required lock connectors in the specified positions.
- Join adjacent tiles without trapping debris in the joints.
- Cut perimeter and obstacle pieces from an accurate template.
- Check that joints remain level and that the grid has not drifted.
- Add adhesive only where the agreed project method requires it.
Do not describe “no glue” as a universal benefit. A contained room and a complex open edge may need different restraint. Record the accepted installation method on the project documents.
7. Plan transitions, thresholds and fixed objects
Different surfaces often create different finished heights. Record the combined thickness of flooring, adhesive and any underlayer at doorways, ramps and adjoining zones. A transition must be planned as part of the layout rather than improvised after both surfaces are installed.
- Keep required expansion joints functional.
- Do not block floor drains or inspection covers.
- Template columns and curved boundaries before final cutting.
- Confirm whether equipment is installed before or after flooring.
- Plan exposed edges and changes in level with the local installer.
8. Inspect the floor before handover
Inspection should distinguish installation progress from final completion. Remove offcuts, tools, cables, adhesive containers and temporary weights before taking finished-project photographs.
Handover checklist
- The installed format, thickness and color match the approved project documents.
- Roll seams are closed and tile joints are level and consistently aligned.
- No visible bubbles, loose edges or unsupported areas remain.
- Adhesive residue and construction debris have been removed.
- Columns, walls, thresholds, drains and transitions are neatly fitted.
- The curing and first-use timing has been communicated to the facility team.
- Spare material, batch information and maintenance notes are recorded.
9. What should the buyer send before quotation?
| Information | Why it matters |
|---|---|
| Dimensioned floor plan | Supports quantity, roll direction, tile grid and cutting allowance. |
| Training-zone use | Helps compare format and thickness directions without assuming one universal system. |
| Subfloor type and photos | Shows preparation, moisture, crack and bonding questions to discuss locally. |
| Columns, curves, drains and thresholds | Identifies special cuts and transition details before shipment. |
| Selected color and approved sample | Connects the visual direction to the actual production order. |
| Delivery city or port | Supports pallet, freight and site-access planning. |
| Target installation date | Allows production, shipping, acclimation and installer scheduling to be coordinated. |
Frequently asked questions
Do rubber flooring rolls need adhesive?
Yes. UMAX rubber rolls are normally bonded to a clean, flat, dry and sound base with a compatible two-component polyurethane adhesive. Follow the selected adhesive manufacturer’s mixing, open-time, application and curing instructions.
Can rubber gym tiles be installed without adhesive?
The composite tiles use required lock connectors. Adhesive may be added or omitted according to the subfloor, perimeter, traffic, room layout and installer assessment, while the connector system remains in use.
How much adhesive should be ordered?
Approximately 1 kg of mixed adhesive per 4 m² is an early planning reference in the UMAX instruction sheet. Actual use depends on the adhesive, trowel, substrate and site conditions. Confirm the final amount with the adhesive supplier and installer.
Can rubber flooring be cut around columns or curves?
Yes. Rolls and tiles can be site-cut for walls, columns and selected curved or irregular boundaries. Template and dry-fit complex pieces before final installation.
What should be checked before installation starts?
Confirm material, dimensions, batch and color; inspect the substrate; mark the layout; identify thresholds and transitions; check tools and adhesive data; and agree on the final installation method with the local installer.
When can the gym floor be used?
The selected adhesive manufacturer and installer must set curing and first-traffic timing. Do not treat a general online time estimate as the control for the project.
Plan the flooring and installation together
Send UMAX the floor plan, training use, subfloor photos, preferred roll or tile format, color and destination for a project-specific starting plan.
Installation content last reviewed by UMAX Sports on 10 September 2026 against the available UMAX rubber flooring instruction sheet and current product specifications. The local installer, substrate assessment and selected adhesive technical data control the final method.